


BTSCreativ
DIY - Kerzenherstellungsset – Komplettset mit Wachsschmelztopf, Messbecher, Thermometer & Zubehör
DIY - Kerzenherstellungsset – Komplettset mit Wachsschmelztopf, Messbecher, Thermometer & Zubehör
Verfügbarkeit für Abholungen konnte nicht geladen werden
Entdecke die Kunst der Kerzenherstellung mit unserem umfassenden DIY Aromatherapie-Kerzenherstellungsset. Dieses Set enthält alles, was du brauchst, um deine eigenen duftenden Kerzen für dein Zuhause oder als kreative Geschenke zu gestalten. Perfekt für Anfänger und erfahrene Bastler – mit hochwertigem Zubehör für präzises Arbeiten.
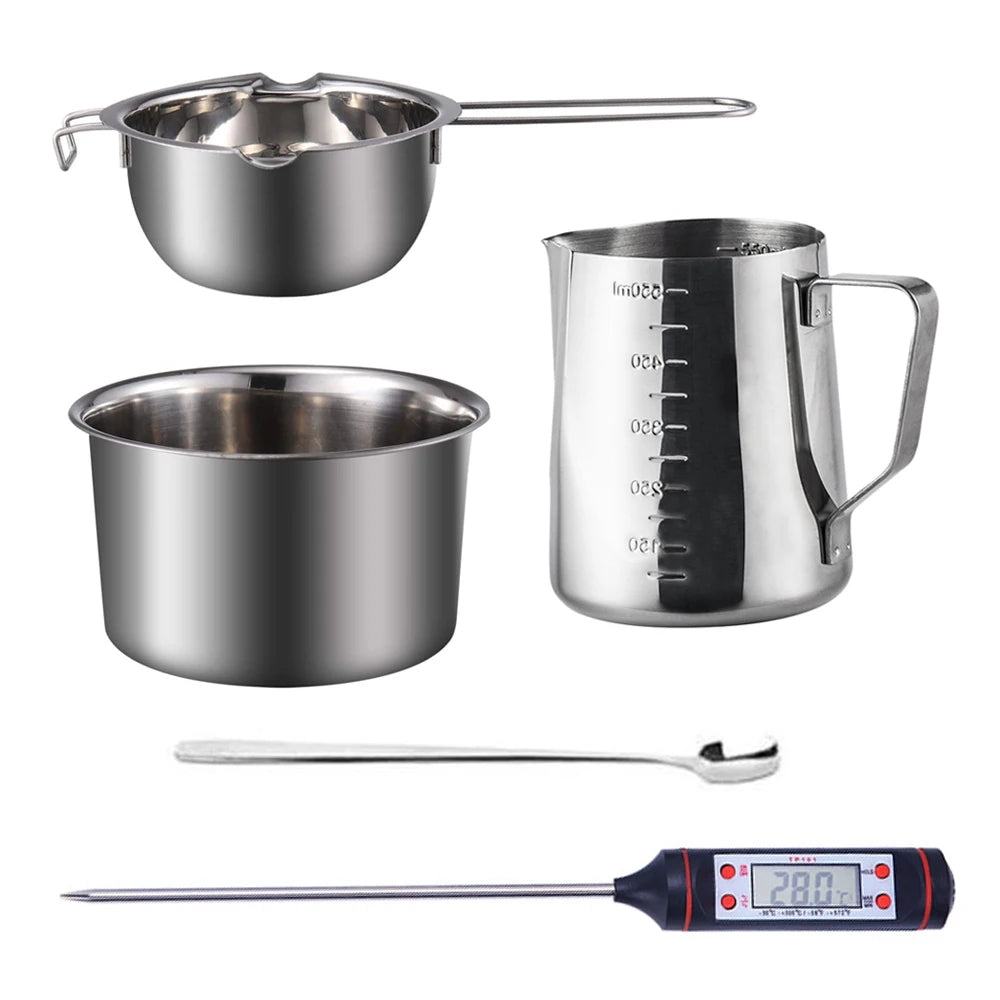
Set-Inhalt:
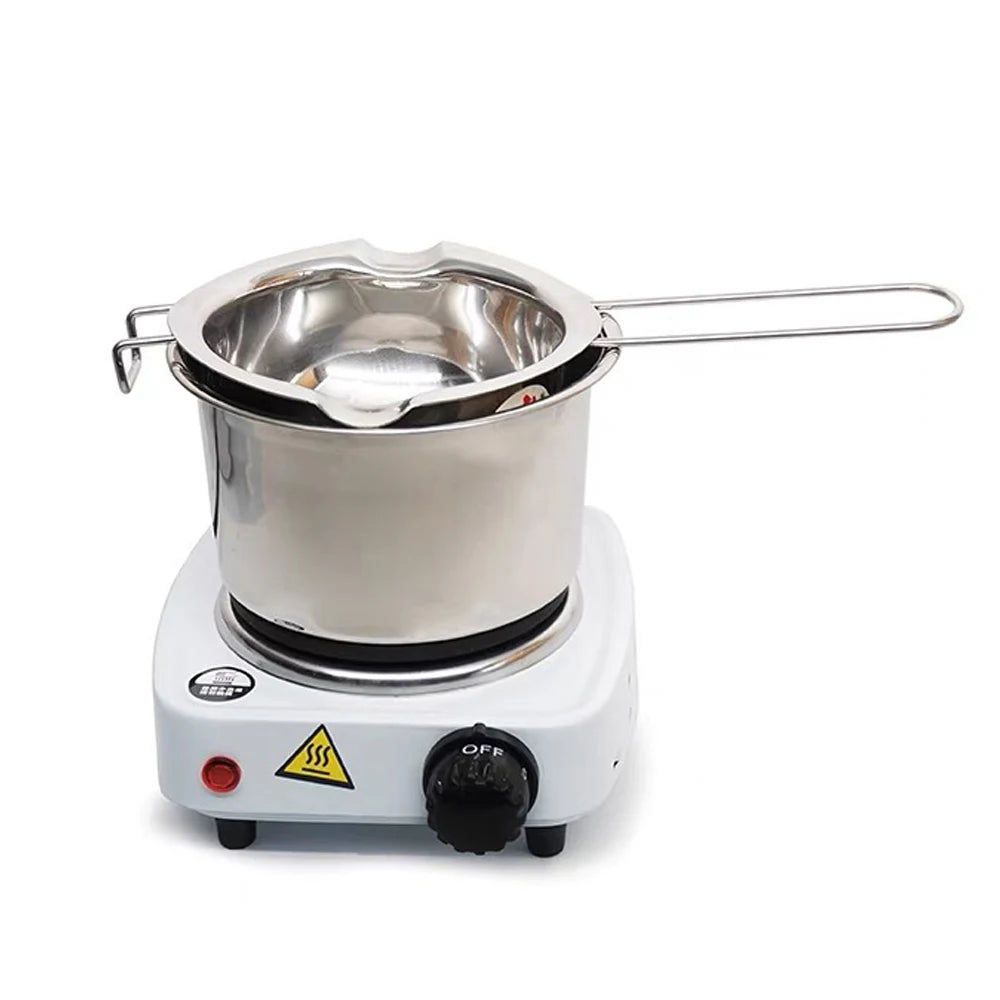
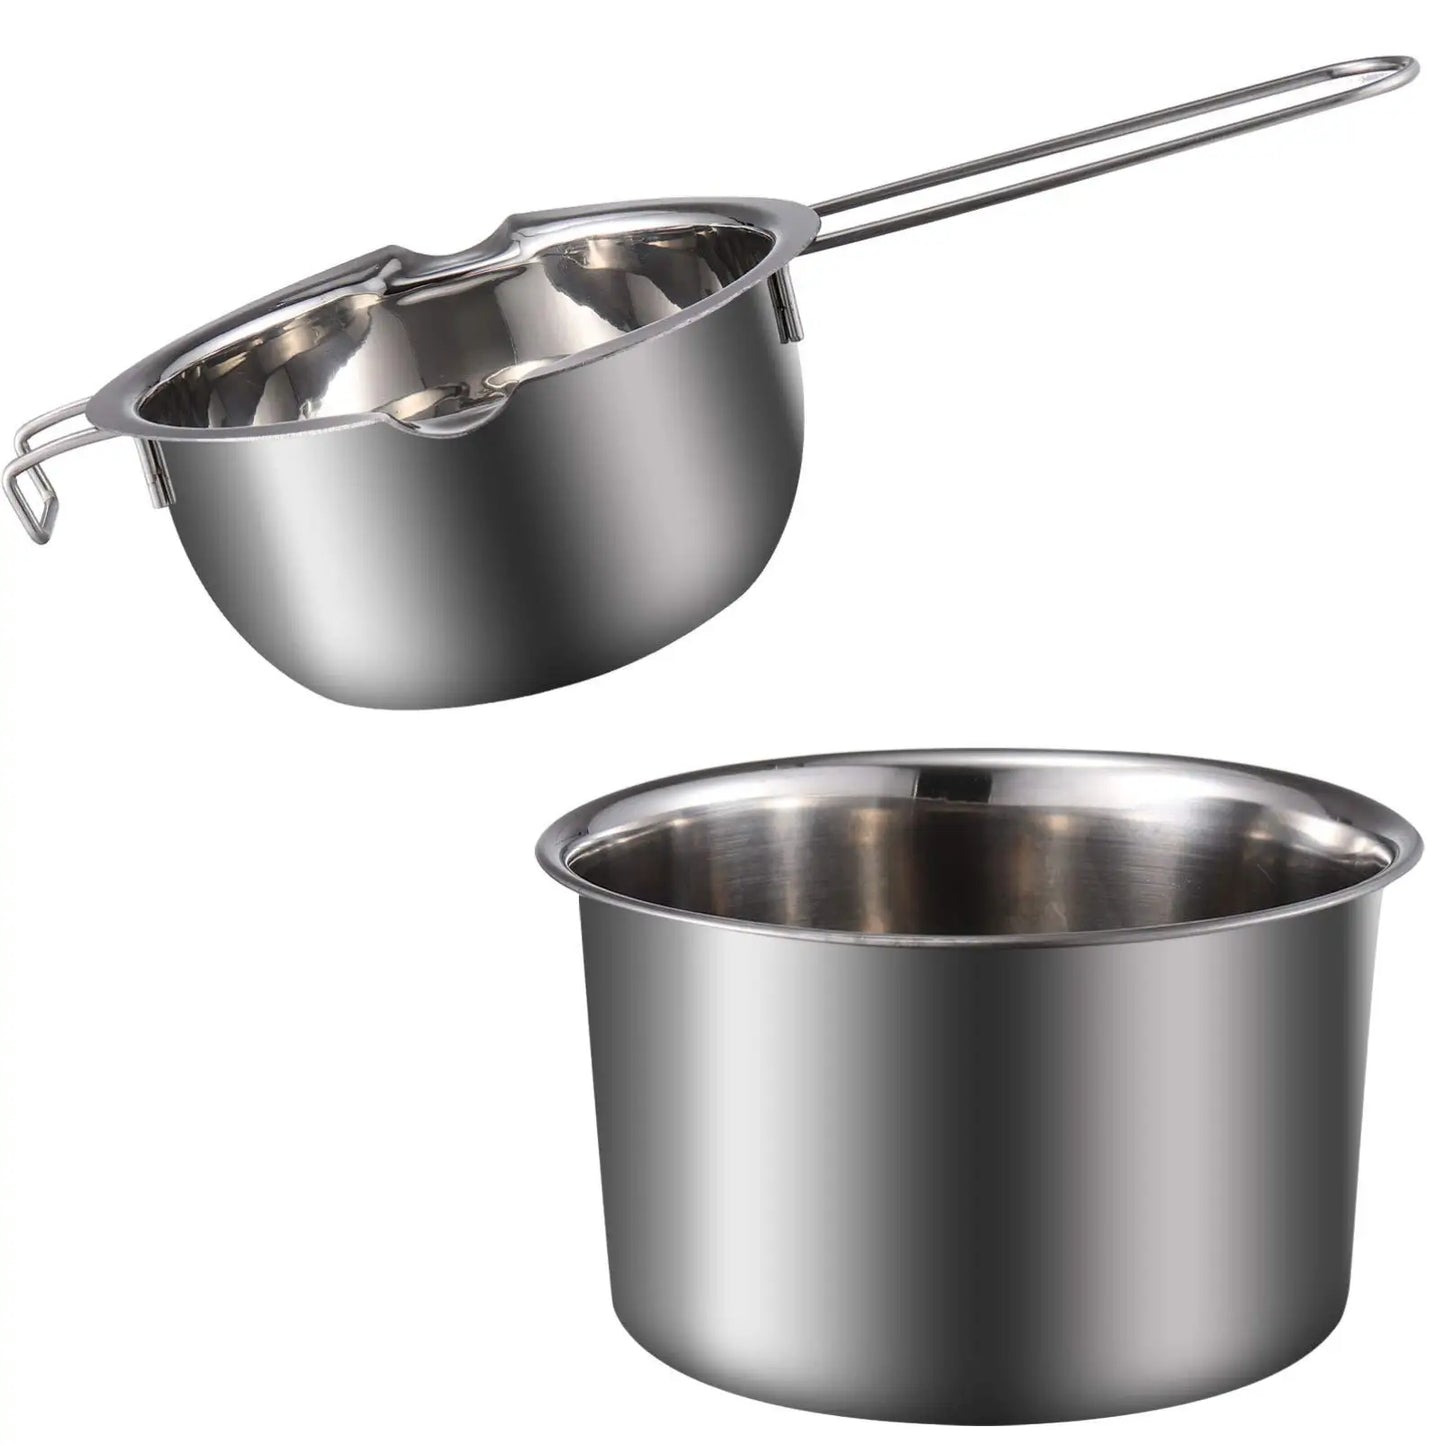
✔ 400 ml Wachsschmelztopf – ideal zum schonenden Schmelzen von Wachs
✔ 800 ml Außentopf (Doppelter Kessel) – sicheres Schmelzen im Wasserbad
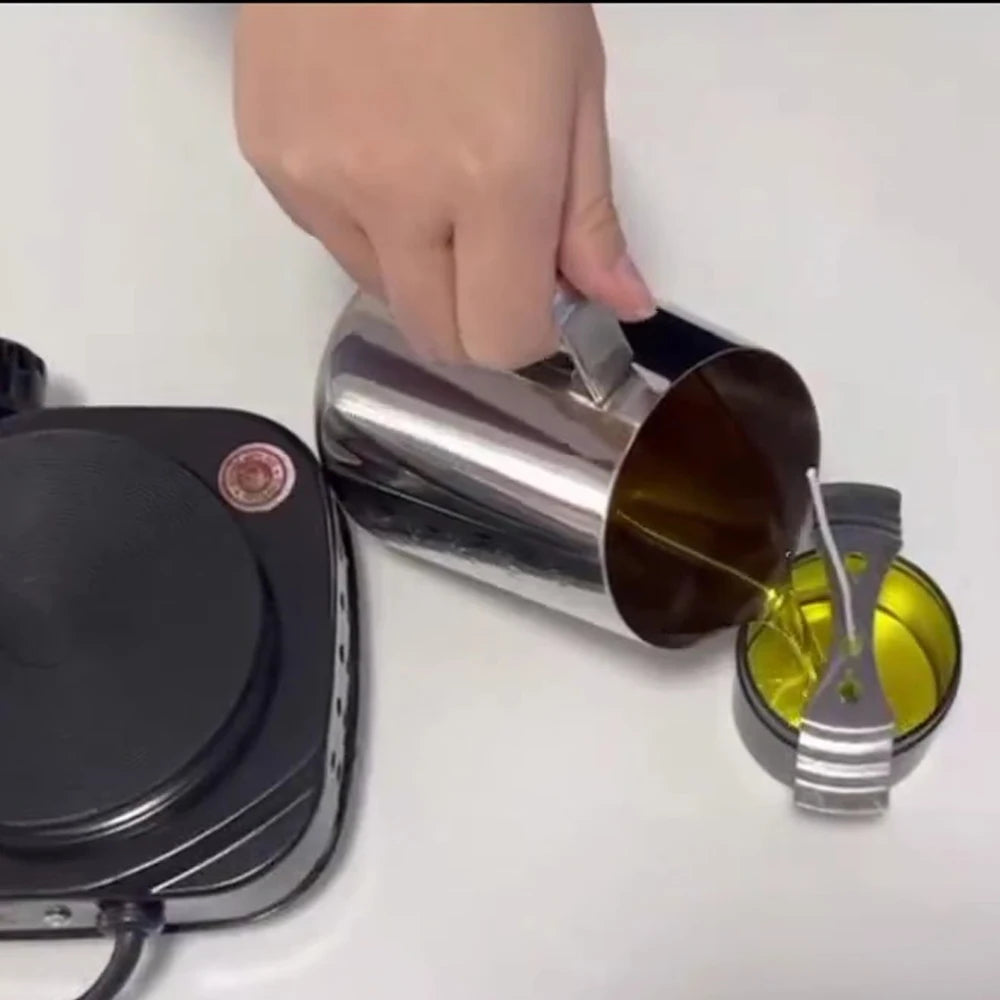
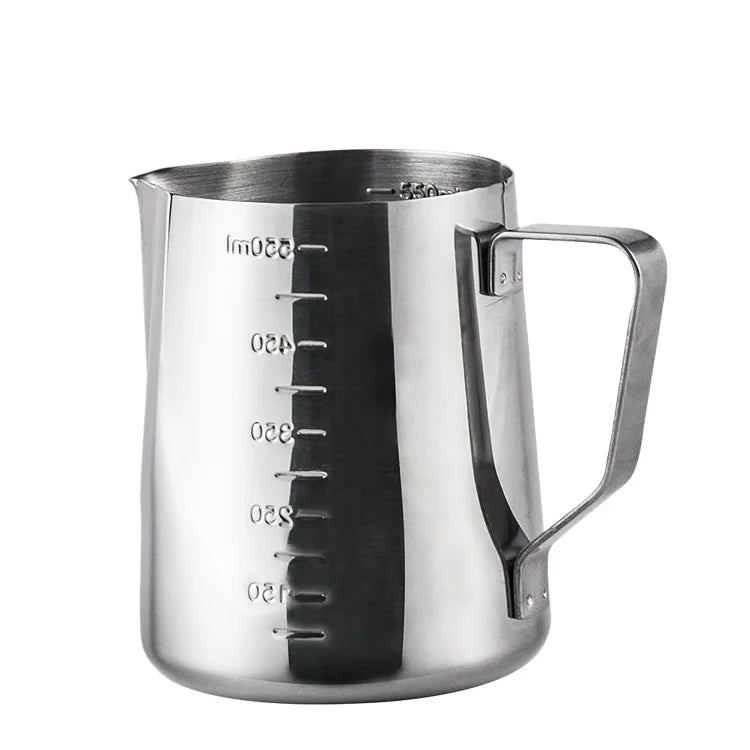
✔ 600 ml Messbecher – zum exakten Abmessen und Gießen
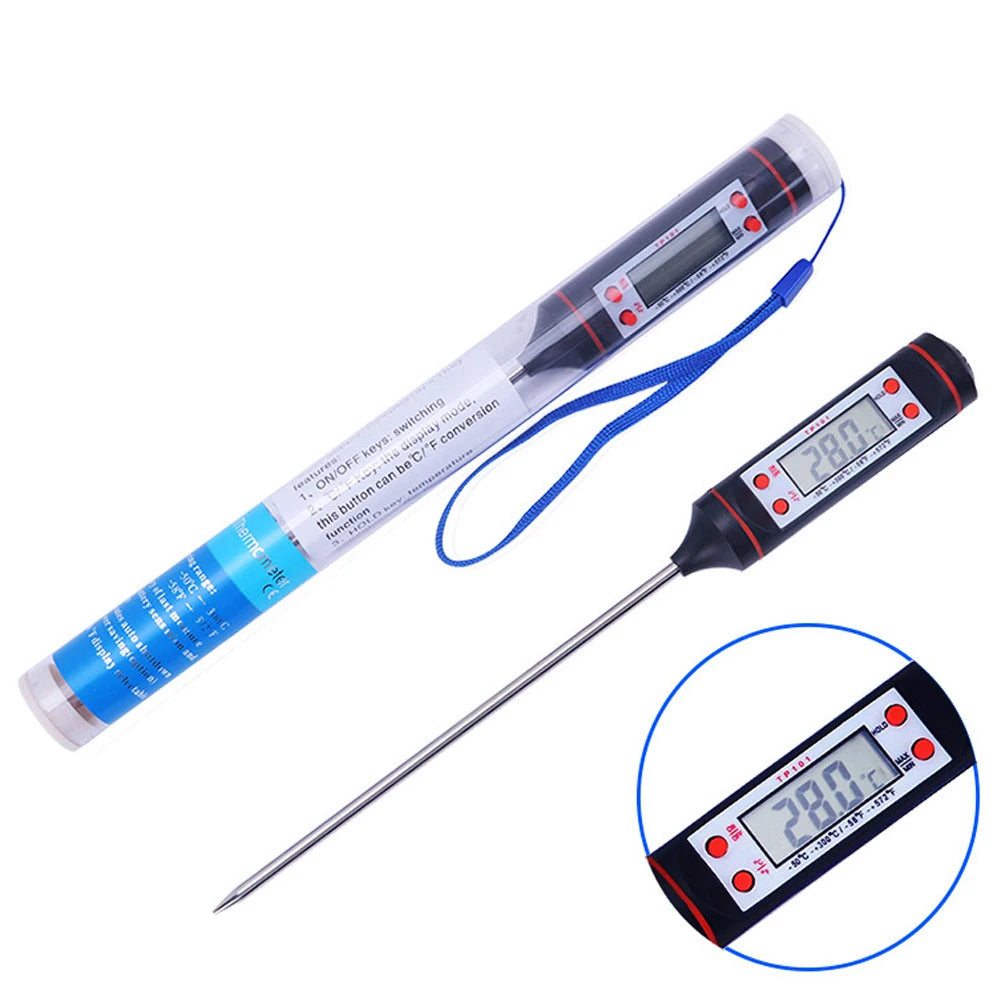
✔ Elektronisches Thermometer – für die perfekte Temperaturkontrolle
✔ 19 cm Mischlöffel – zum sanften Umrühren des Wachses
Eigenschaften:
-
Vielseitig einsetzbar – Für Kerzen, Seifen, Plaster und kreative DIY-Projekte
-
Hochwertiges Edelstahl-Set – Langlebig, rostfrei und einfach zu reinigen
-
Einfache Handhabung – Ideal für Anfänger & Fortgeschrittene
-
Perfekte Geschenkidee – Zum Geburtstag, Weihnachten oder für kreative Momente
Technische Details:
-
Material: Edelstahl (Töpfe, Becher, Löffel), Kunststoff (Thermometer)
-
Maße:
-
Wachsschmelztopf: 400 ml
-
Außentopf: 800 ml
-
Messbecher: 600 ml
-
Mischlöffel: 19 cm lang
-
Thermometer: Elektronisch, ohne Batterie
-
Anwendungstipps:
-
Schmelze das Wachs im Wachsschmelztopf über dem Wasserbad.
-
Überwache die Temperatur mit dem Thermometer (ideal 71–82°C).
-
Verfeinere dein Wachs mit Düften oder Farben deiner Wahl.
-
Gieße das Wachs in vorbereitete Formen und lasse es abkühlen.
Sicherheitshinweis:
Bitte niemals heißes Wachs unbeaufsichtigt lassen und stets hitzebeständige Handschuhe verwenden.
Customer Reviews

Candle Making Set 1
Package contains:
1. 400ml wax melting pot
2. 800ml melted wax outer pot
3. 600ml measuring cup
4. Electronic thermometer (excluding battery)
5. 19cm mixing spoon

Candle Making Set 1
Package contains:
1. 400ml wax melting pot
2. 800ml melted wax outer pot

Electronic thermometer
(excluding battery)

600ml measuring cup


Candle Making Kit Instruction Manual
Thank you for purchasing our Candle Making Kit. This manual will guide you through the tools included in your kit and provide instructions on how to use them to make your own candles.
Kit Contents:
• Wax Melting Pot
• Double Boiler Pot
• Thermometer
• Stirring Spoon
• Measuring Cup
Instructions:
1. Setting Up Your Workspace:
• Choose a clean, heat-resistant surface to work on.
• Keep your space well-ventilated and free from any flammable materials.
• Have a first aid kit nearby in case of accidental burns.
2. Preparing the Wax:
• Place the wax that you'll be melting into the Wax Melting Pot.
• Fill your Double Boiler Pot with water up to the halfway point and place it on the stove.
• Position the Wax Melting Pot inside the Double Boiler Pot so that it floats on the water without touching the bottom.
• Turn the stove to medium heat and wait for the water to start simmering.
3. Melting the Wax:
• As the water heats up, the wax in the Wax Melting Pot will begin to melt.
• Use the Stirring Spoon to gently stir the wax occasionally, ensuring even melting.
• Monitor the temperature of the wax using the Thermometer. Most waxes should be melted between 160°F to 180°F (71°C to 82°C).
4. Adding Fragrances and Colors (Optional):
• Once the wax is fully melted, you can add dyes or fragrance oils if desired.
• Stir thoroughly with the Stirring Spoon to evenly distribute the additives.
• Consult the packaging of your dye or fragrance for specific temperature recommendations.
5. Preparing the Mold:
• While the wax is melting, prepare your candle mold by securing the wick in the center.
• Use a wick holder or a pencil to keep the wick upright and centered as the wax cools later.
6. Pouring the Wax:
• When the wax has reached the correct temperature and all additives have been mixed in, carefully remove the Wax Melting Pot from the Double Boiler.
• Slowly pour the wax into the mold, using the Measuring Cup if needed for precision.
• Let the wax cool undisturbed until it's completely solidified.
7. Finishing Touches:
• Once the wax is set, trim the wick to about 1/4 inch above the wax surface.
• If necessary, use a heat gun or hairdryer to smooth out the surface of the candle.
8. Cleaning Up:
• After use, clean your tools with hot soapy water.
• Be sure to remove any remaining wax while it's still warm, as it's much harder to clean once cooled.
Safety Precautions:
• Never leave melting wax unattended.
• Keep the thermometer and other tools away from children.
• Use heat-resistant gloves when handling hot equipment.
Enjoy creating your custom candles, and remember to always follow safety guidelines during the process.